Make payments with PayPal - it's fast, free and secure! registry | CVN on Facebook | tech | news | email login Make payments with PayPal - it's fast, free and secure!


Welcome to CVN - Your Panther platform headquarters!


Custom Search


Page 1 of 7 1 2 3 4 5 6 7 >
Topic Options
#2438760 - 01/14/12 11:16 PM How to Change your EATC O-Rings
Marqed_Man Offline
Over the Hill

Registered: 04/18/08
Posts: 3576
Loc: il
If you were like me, using your EATC became frustrating because the air wouldnt vent where I wanted it. The AC started only coming from the defroster. No matter what button I pressed it was all coming from the defroster. Heat, AC.... it didnt matter. Well I did a LOT of research and found out what the problem was. There are solenoids in the EATC. 4 of them. They work on suction and in order to get and keep that suction they put rubber o-rings around the solenoids. After time and weather changes those o-rings become rock hard and then brittle. When that happens the system can not keep suction and the system reverts to the fail-safe which is air blowing out of the defroster. This is how you take off the old o-rings and put new ones on! smile 
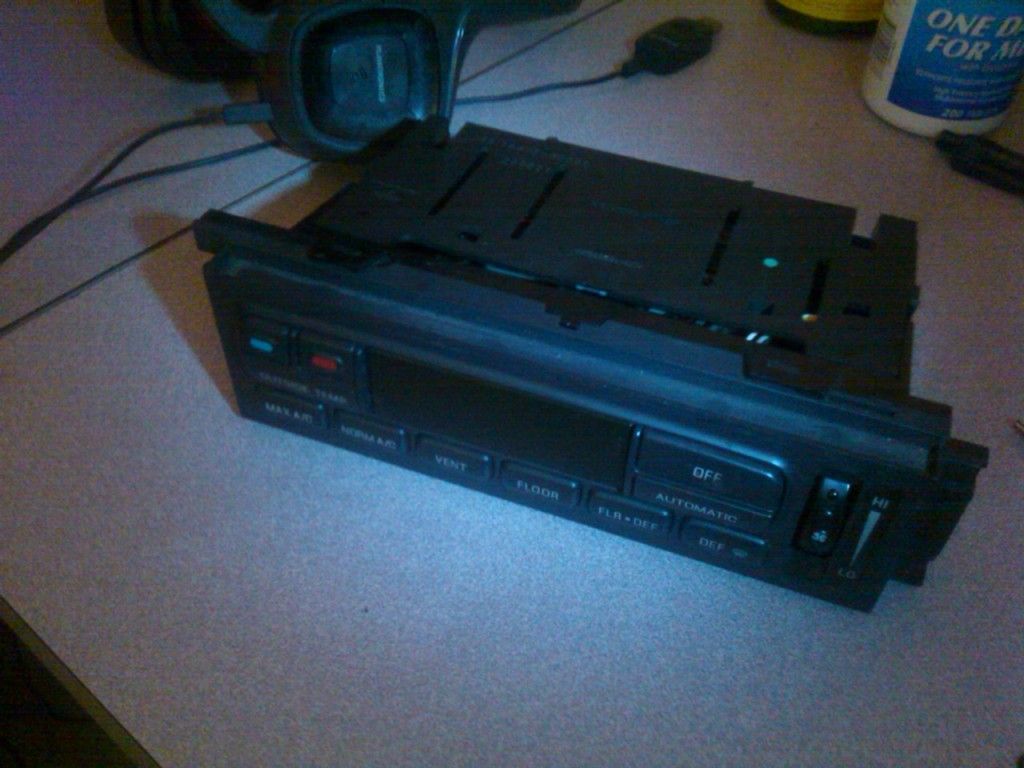
You need to remove the EATC module from the car. Thats fairly easy. Pop off the front trim which is being held on by clips, remove 4 screws around the module, unplug the module and remove the hose housing.
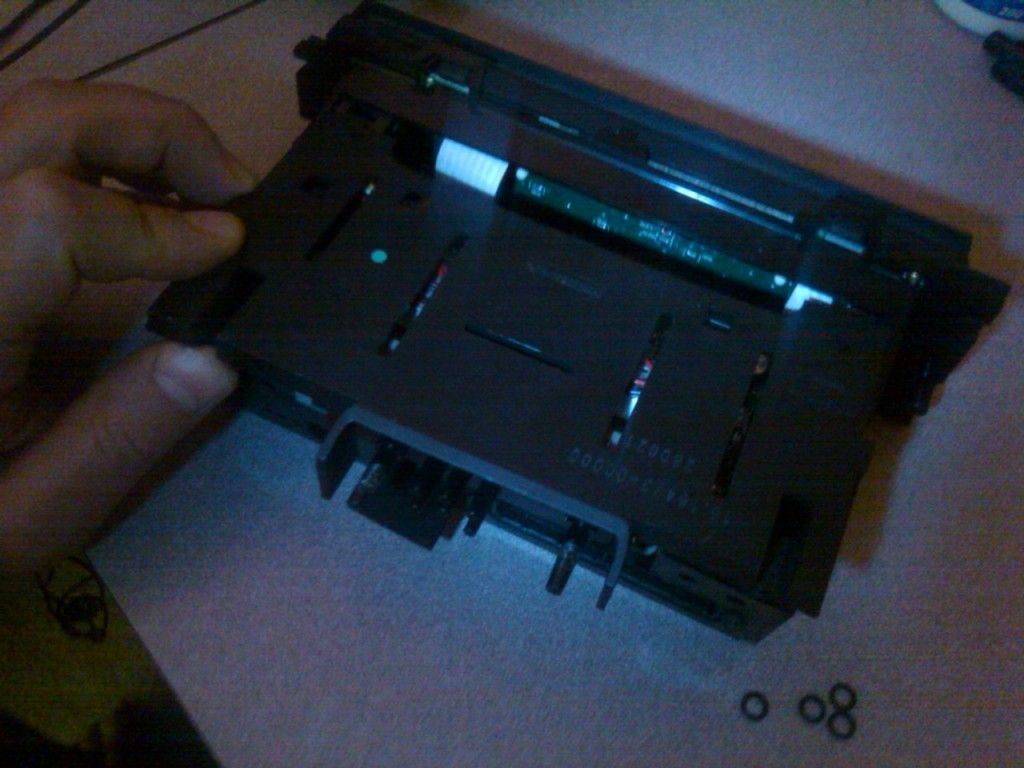
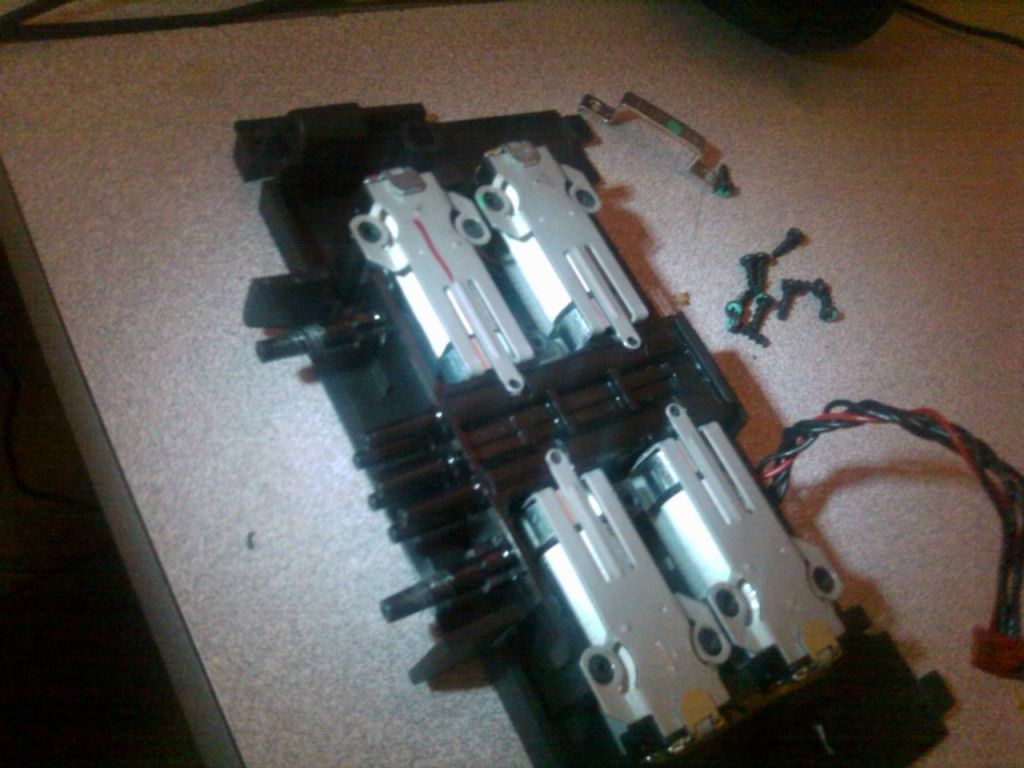
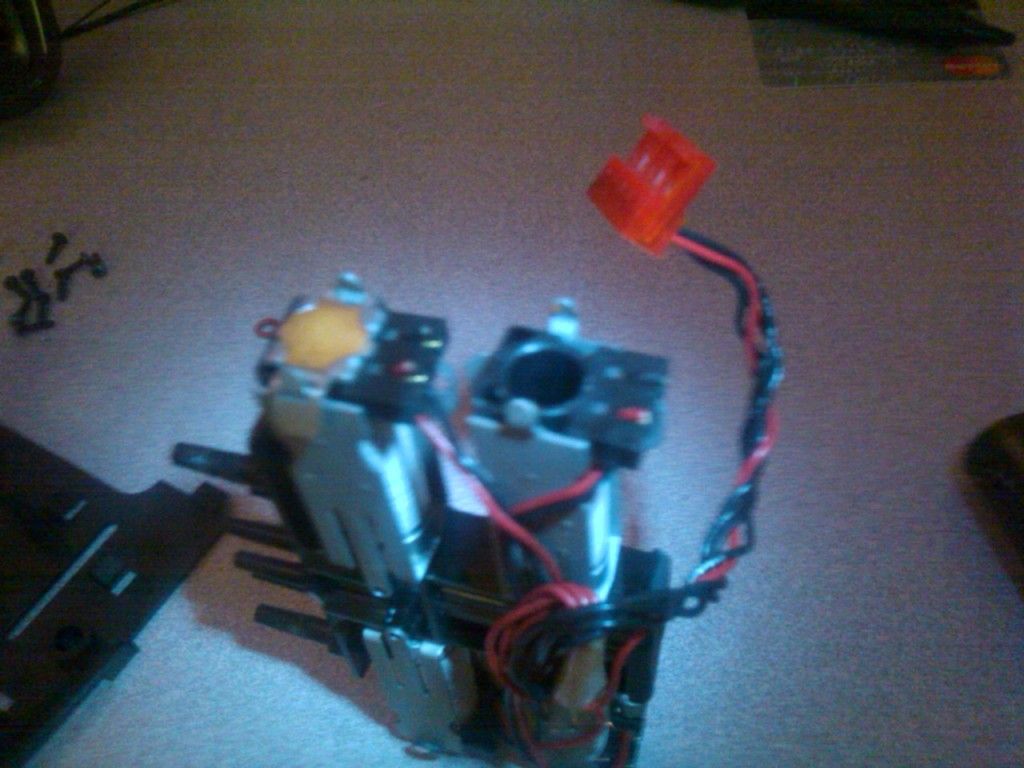
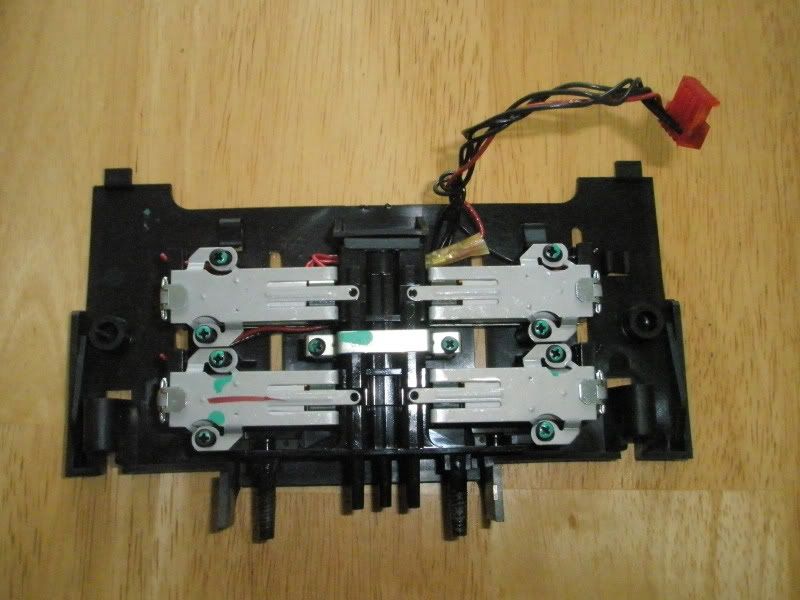
Once you have it out it will look like this:

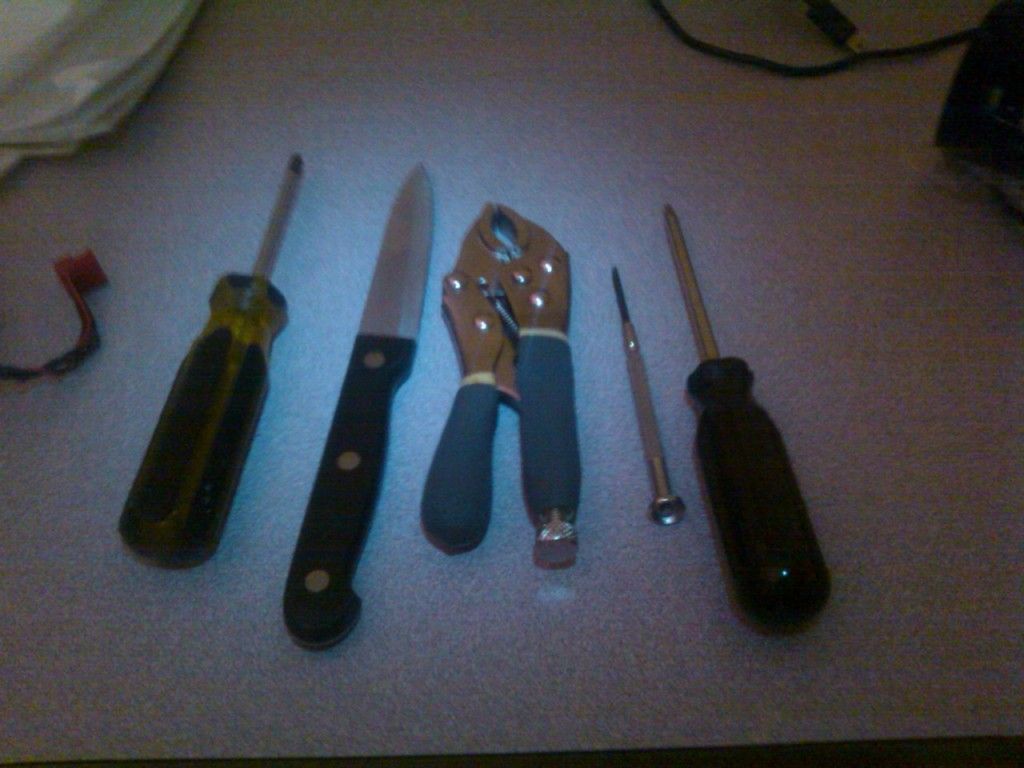
THESE ARE THE TOOLS I USED TO CHANGE OUT THE O-RINGS:
That one tool is a torx head

These are the new O-rings you can order from McMaster Carr located in Elmhurst IL and here online: http://www.mcmaster.com/#contact/=ft6bcg

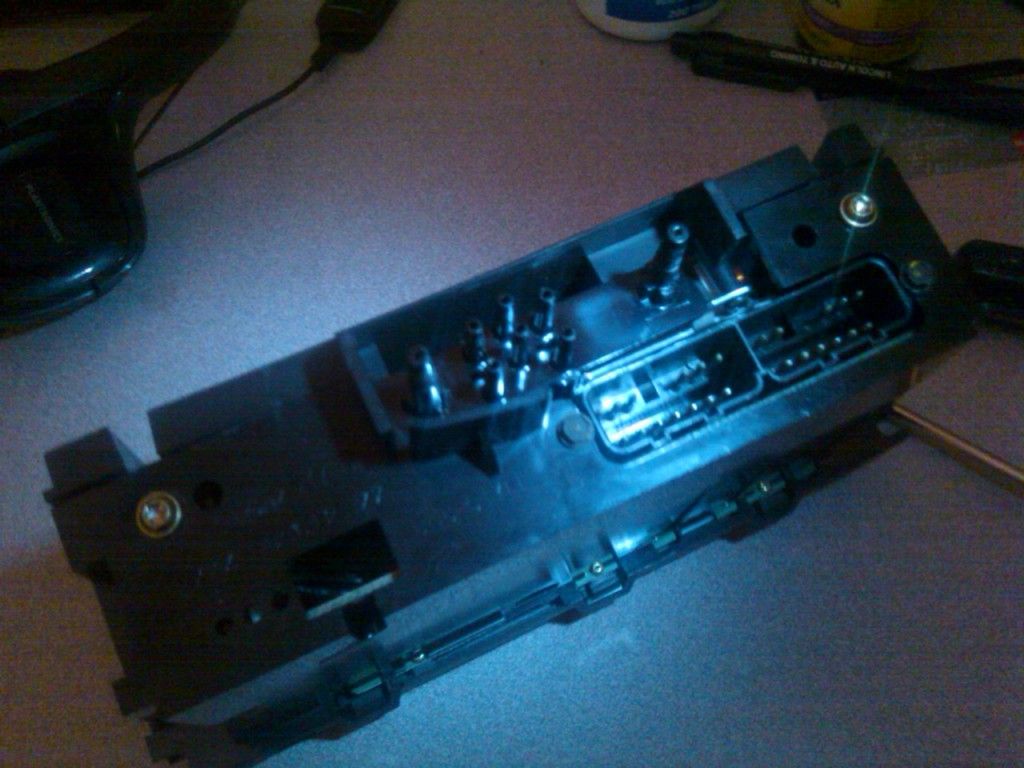
This is what the rear of the unit looks like:

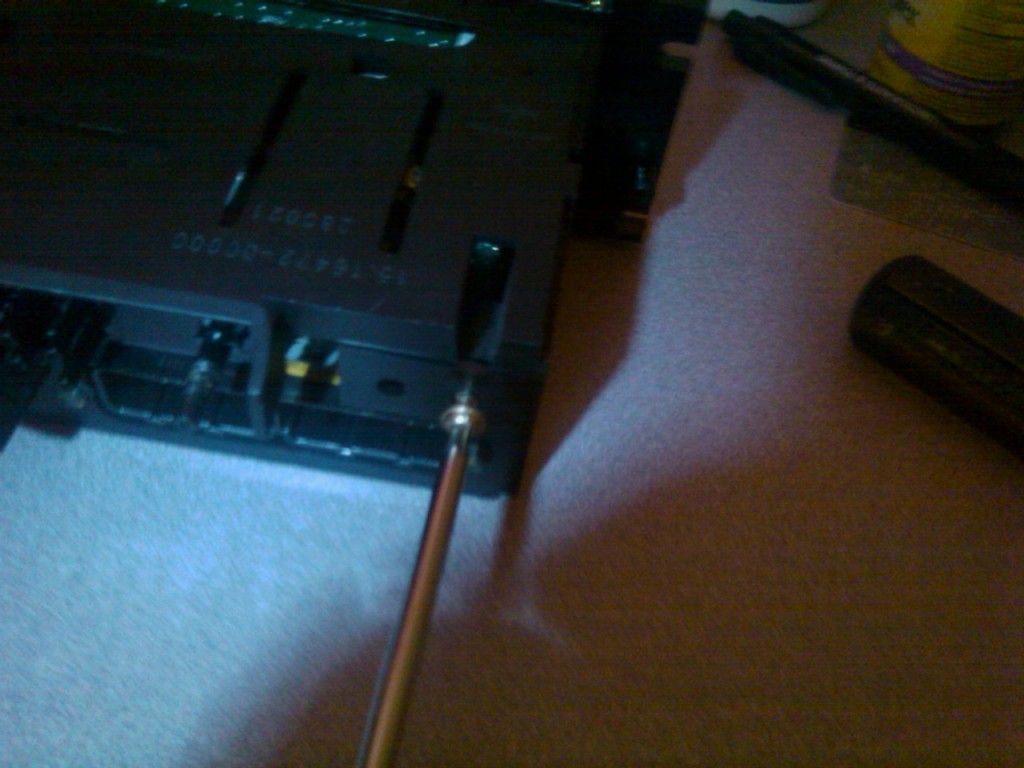
Use the Torx to remove the two rear screws:

Slide the top panel out and up:

Note the top board has a wire plug (red), plugged into the main board on the bottom half:
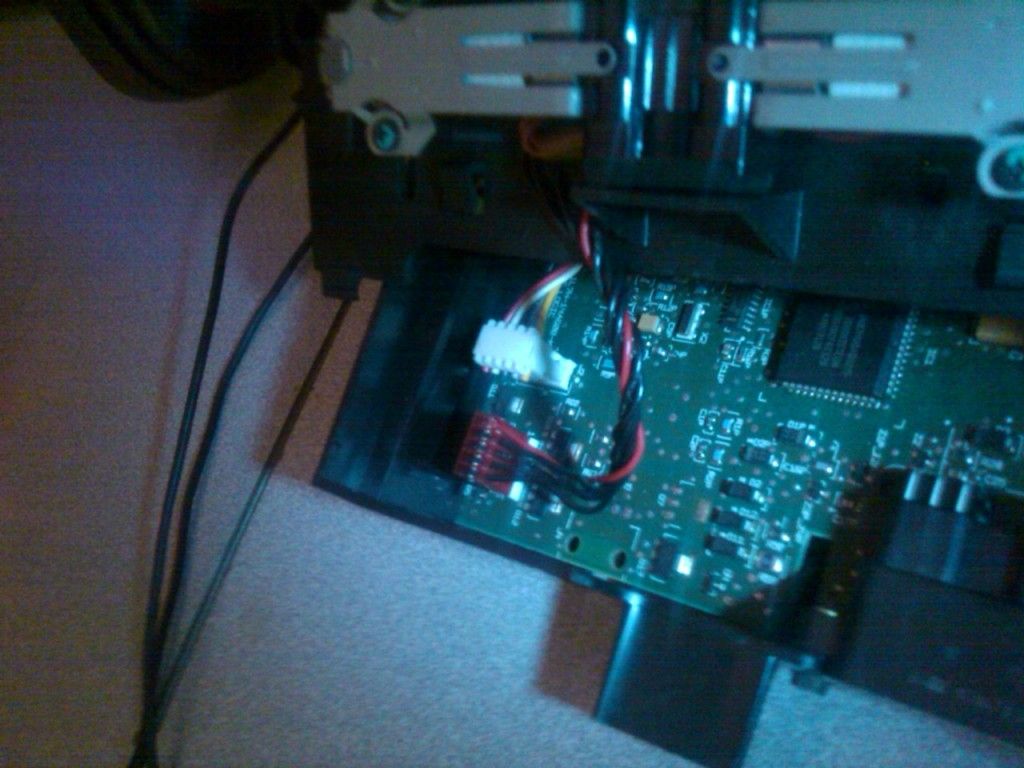
Unplug that wire:

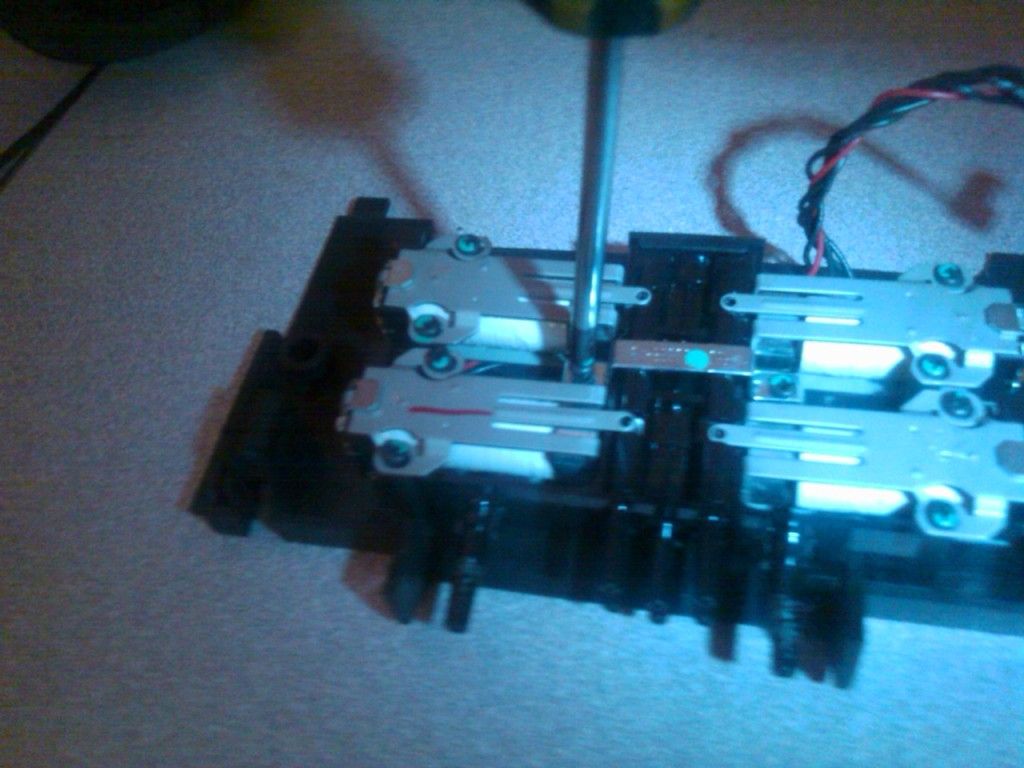
This is what the top piece looks like. You want to remove all of the screws!

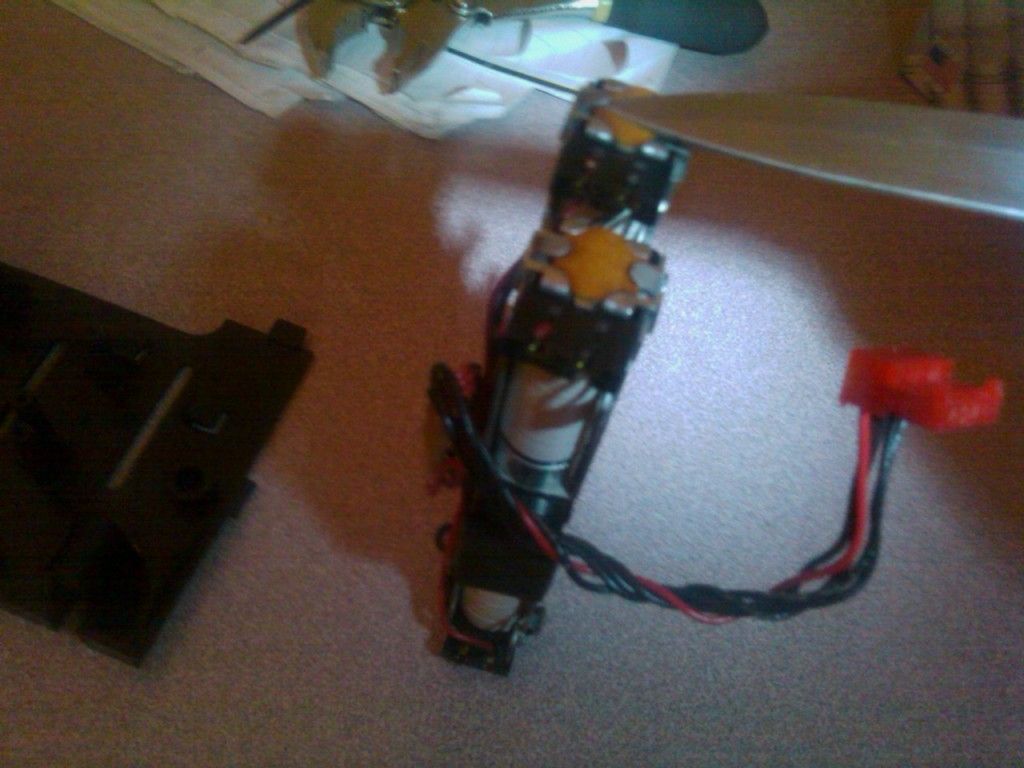
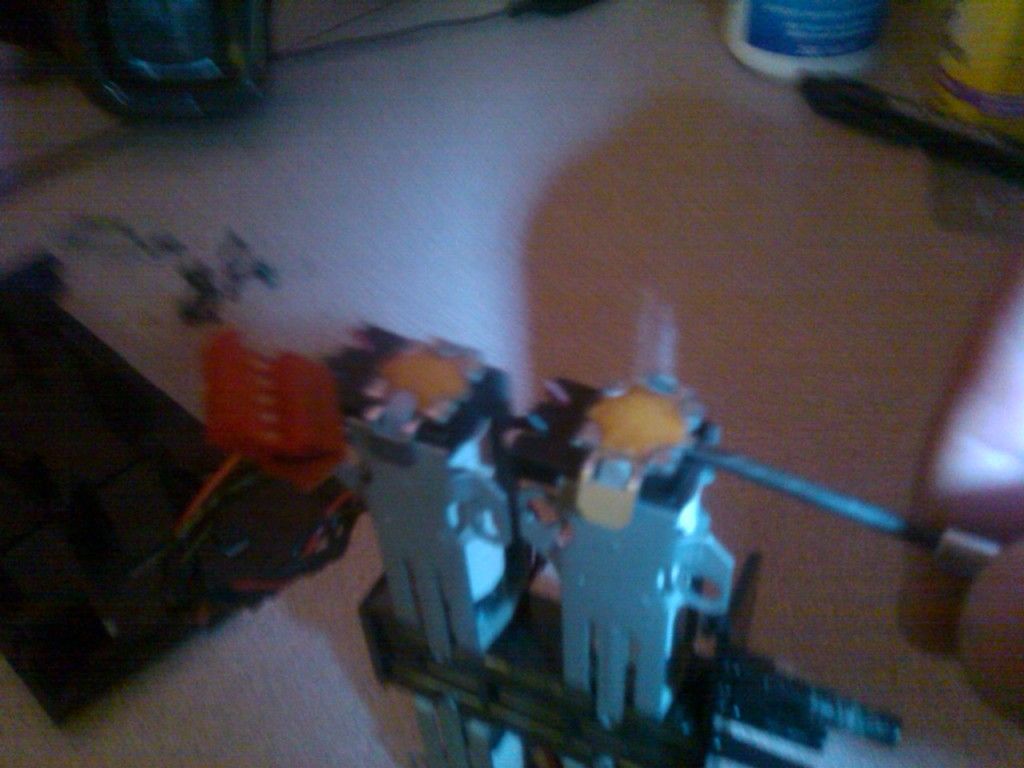
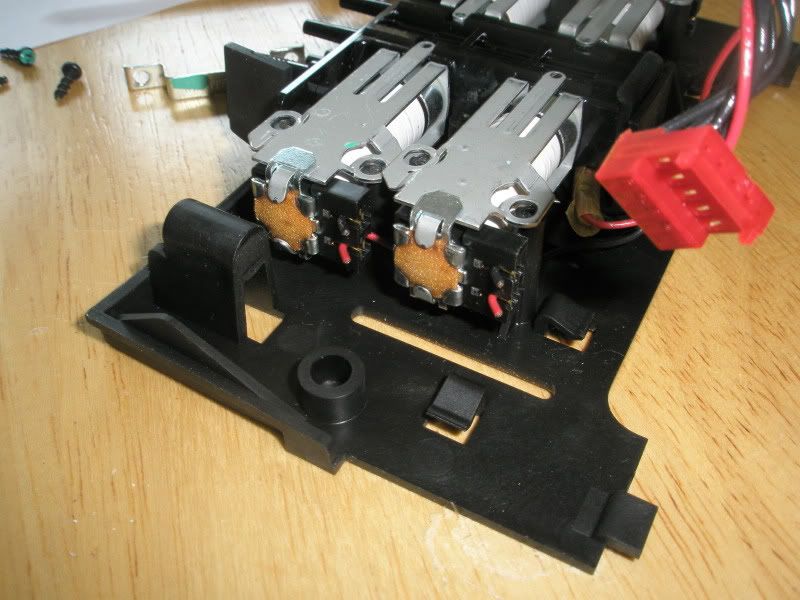
This is what it looks like when youre ready to remove the solenoids from the plastic housing

Here it is when its taken out. You need to pry back the 2 metal prongs holding in the solenoid. I used a knife. Obviously be freakin careful!

Next there are metal clips on the side. Bend those up slightly.

BEFORE prongs were bent:

AFTER they were bent:

Next pop out the solenoid

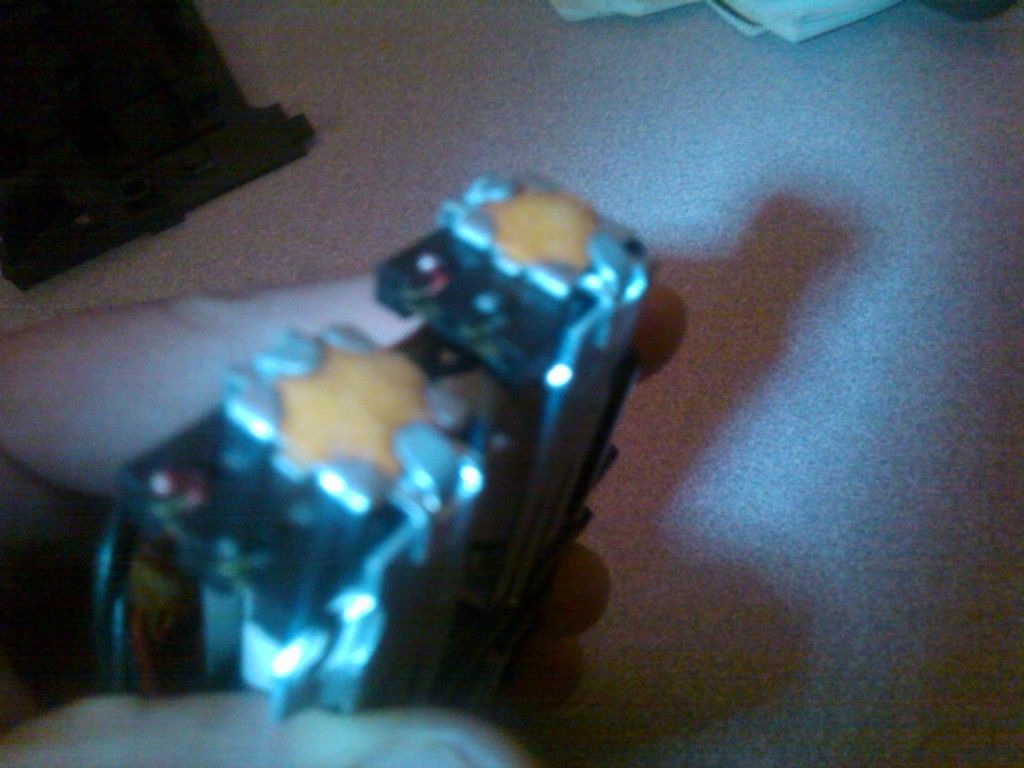
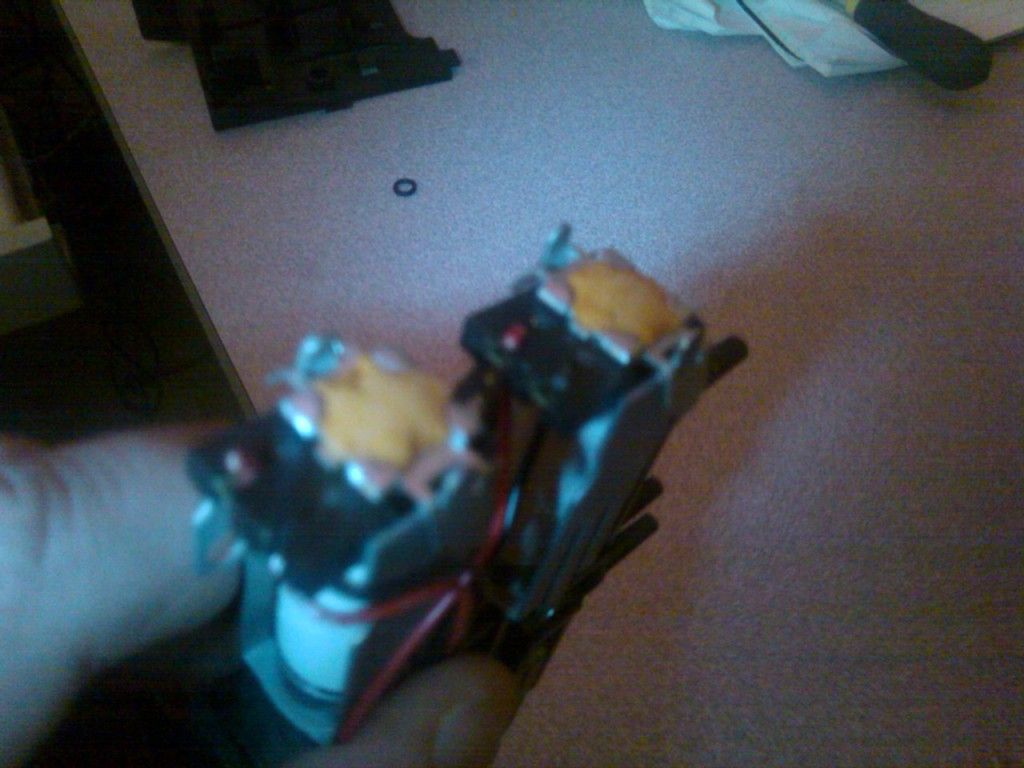
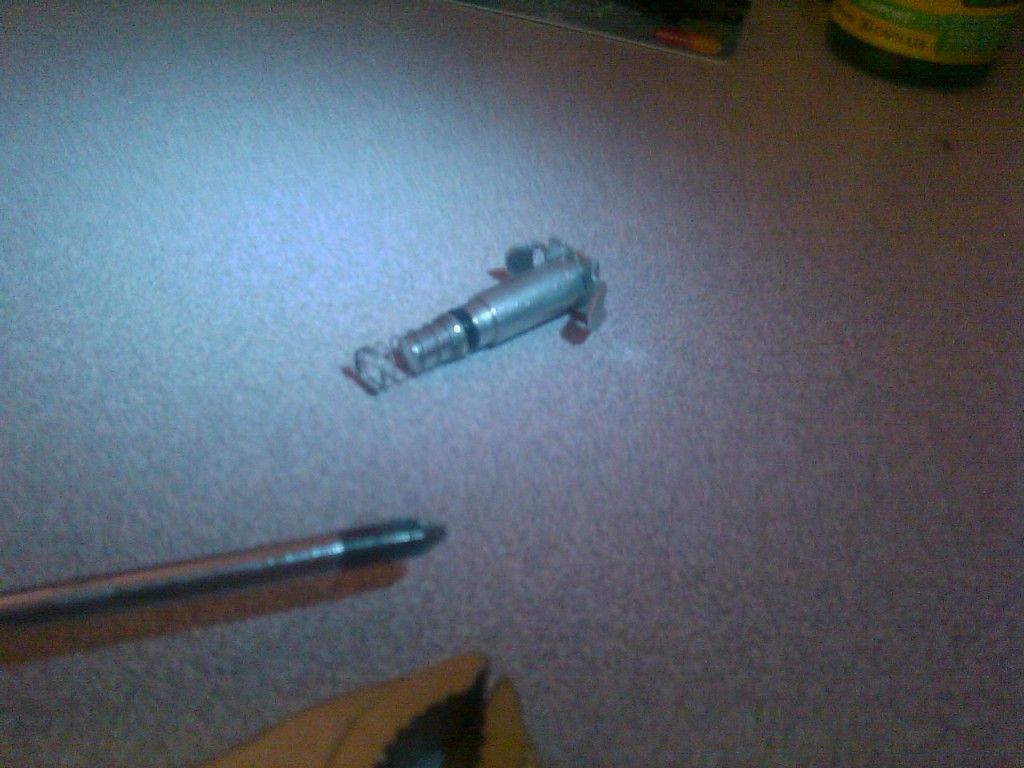
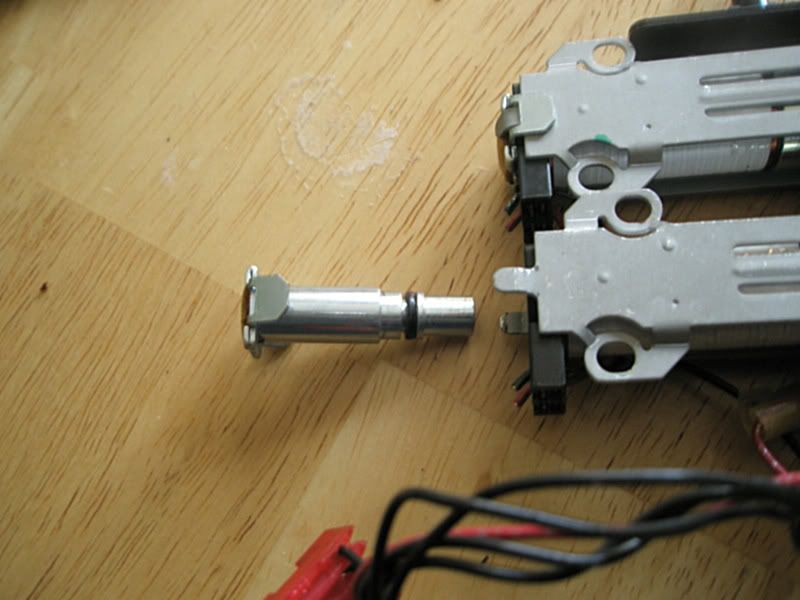
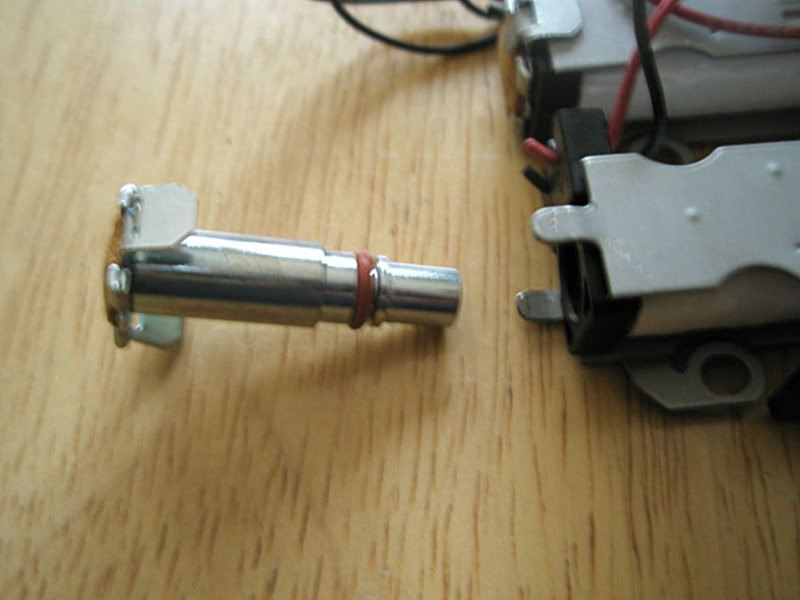
This is the solenoid. NOTE the spring (dont lose that!) and the black o-ring that needs to be replaced:

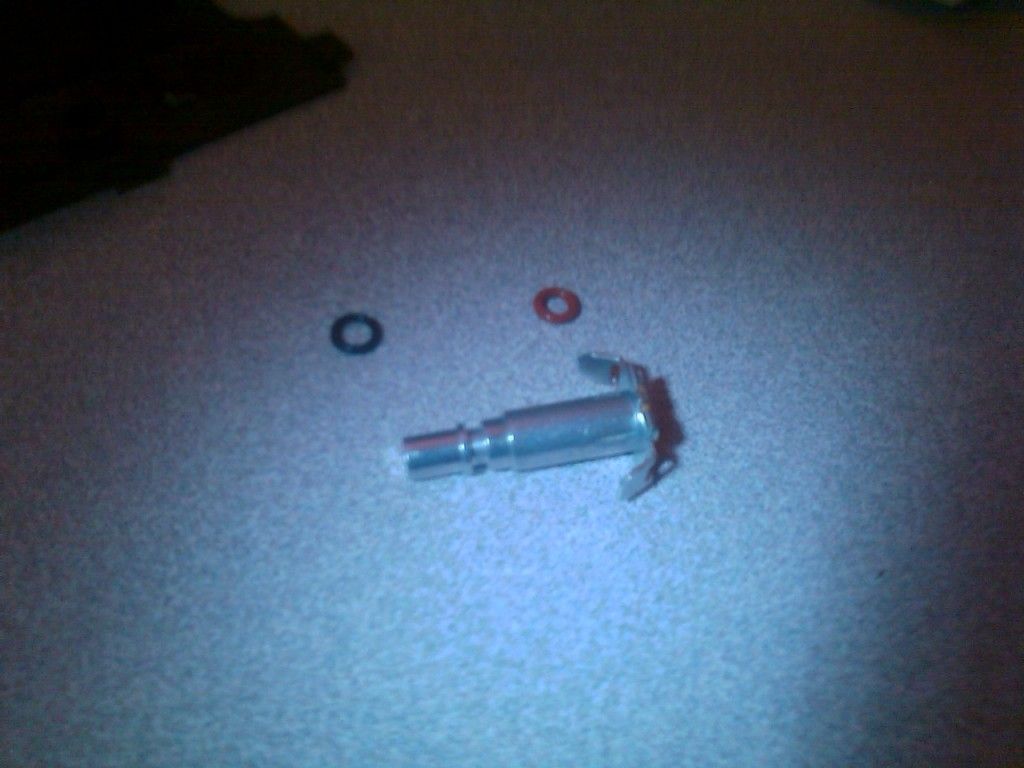
Pry off the old o-ring. This is the solenoid with the new o-ring and old one (black) next to it:

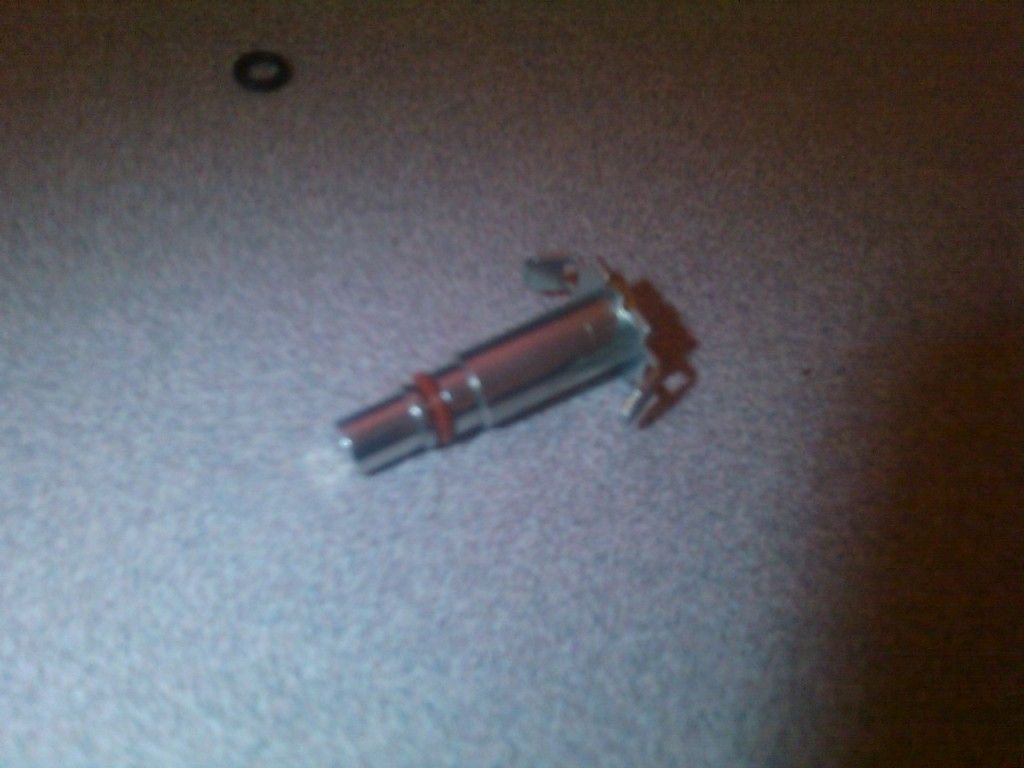
Here is the solenoid with the new o-ring on:

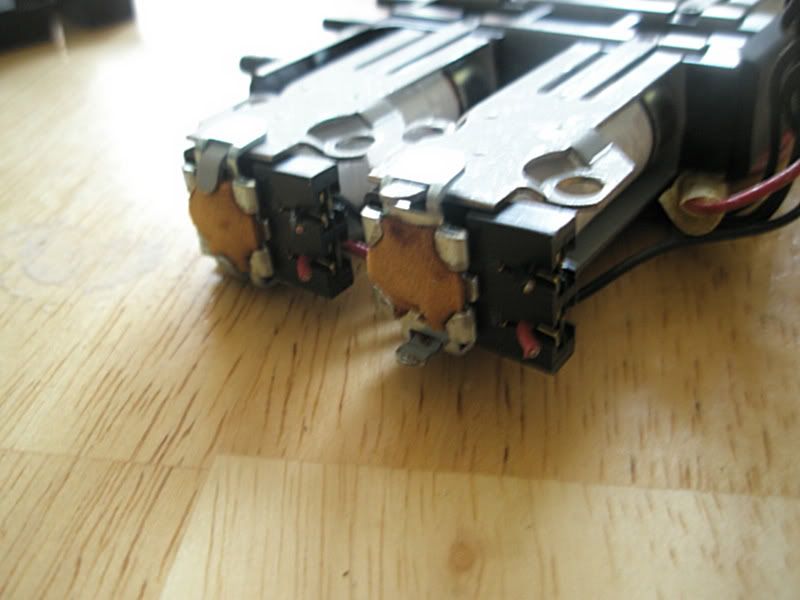
This is what the module looks like with the solenoid popped out:


When putting the solenoids back in, you might have to push fairly hard. Make sure you have the springs in before you put the solenoids back in!!!! Make sure they are seated well. Once you have replaced all of them take pliers and bend the metal clips back to keep the solenoids from popping out while the unit is in use.
Now just reverse the steps you used to take the EATC apart.
Install it back into the car and now you will have a like-new functioning EATC! laugh
Enjoy!
_________________________
2004 LIncoln Town Car - Dark Charcoal Metalic. Motor has 82K miles. The rest of her has 290K miles. Past owner didnt take care of her. Im bringing her back to exceptional condition

Top
Links
#2438968 - 01/15/12 11:00 AM Re: How to Change your EATC O-Rings [Re: Marqed_Man]
AACoPD05 Offline
Over the Hill

Registered: 10/02/08
Posts: 1512
Loc: Maryland
Excellent write up with pics. BOK anyone?
_________________________
2004 Ford Crown Victoria LX Sport - 1 of 2656 - Midnight Gray w/Dark Charcoal
Mods: 21mm rear sway bar, Marauder head unit, Marauder sub/amp, Ford "premium" two-way door and deck speakers, Curless cure, Ford Focus fog lamps with Marauder head light switch, trunk organizer, short over head console with Homelink.

2001 F250 crew cab, 7.3L Diesel

2022 Explorer Police Interceptor

Top
#2439054 - 01/15/12 02:13 PM Re: How to Change your EATC O-Rings [Re: Marqed_Man]
capt512 Offline
Over the Hill

Registered: 12/22/02
Posts: 2470
Loc: KC, MO
Just FYI you may have to cycle everything on and off a few times for it all to work as it should afterwords. I had to turn it on and off probably 10 times before everything started working as it should. This is a very simple fix in all honestly that anyone could do themselves and save tons of money. Great writeup!
_________________________

2001 CVPI - Ex-Kansas Turnpike Authority (Sold)
2000 CVPI - Ex-Kansas Turnpike Authority
2003 Marauder (300A)
2006 CVPI - Ex-NJ Airport Police 55k Miles

Top
#2439059 - 01/15/12 02:24 PM Re: How to Change your EATC O-Rings [Re: capt512]
Marqed_Man Offline
Over the Hill

Registered: 04/18/08
Posts: 3576
Loc: il
Thanks guys smile
Sorry the photos arent really clear. I used my cell phones camera which isnt the best quality as you can see. It IS an easy fix. If you look on ebay, people are charging $250 to do this!
_________________________
2004 LIncoln Town Car - Dark Charcoal Metalic. Motor has 82K miles. The rest of her has 290K miles. Past owner didnt take care of her. Im bringing her back to exceptional condition

Top
#2439777 - 01/16/12 09:15 PM Re: How to Change your EATC O-Rings [Re: Marqed_Man]
rmui Offline
Member

Registered: 06/21/08
Posts: 376
Loc: West Lafayette, IN
Nice write-up! Is the part number for those O-Rings universal/standardized? I'd like to try and find them somewhere local. If not, do you know the specs for them?
_________________________
2003 Crown Victoria LWB [TOTALED - RIP]
206K, Ford G5 Alloy Metallic, Crunch amp, 2 15" American Bass DX subs, stock otherwise.

2004 Crown Victoria LX Sport
160K, Black on Black


Top
#2439965 - 01/17/12 04:09 AM Re: How to Change your EATC O-Rings [Re: rmui]
Marqed_Man Offline
Over the Hill

Registered: 04/18/08
Posts: 3576
Loc: il
Originally Posted By: rmui
Nice write-up! Is the part number for those O-Rings universal/standardized? I'd like to try and find them somewhere local. If not, do you know the specs for them?


Thanks smile
I wish I could answer your question. I believe the original o-rings are rubber and the new ones are polyurethane. The part number for McMaster Carr is 007S70. I think it cost $4.50
I wish I could give you specific specs but I just dont have any.
_________________________
2004 LIncoln Town Car - Dark Charcoal Metalic. Motor has 82K miles. The rest of her has 290K miles. Past owner didnt take care of her. Im bringing her back to exceptional condition

Top
#2534485 - 06/02/12 09:47 PM Re: How to Change your EATC O-Rings [Re: Marqed_Man]
thephnx39 Offline
Member

Registered: 10/06/07
Posts: 103
Loc: Texas
How did you put new o ring on , i can only get it on 1st part they keep breaking when i try to slide them down metal ring into place
_________________________
2006 MERCURY GRAND MARQUIS LS

Top
#2536518 - 06/06/12 10:29 AM Re: How to Change your EATC O-Rings [Re: thephnx39]
matlobi Offline
n00b

Registered: 04/01/11
Posts: 23
Loc: Twin Cities, MN
I discovered that while doing mine, two of the rings were still quite pliable, but the opposite two were very stiff and brittle.

Originally Posted By: thephnx39
How did you put new o ring on , i can only get it on 1st part they keep breaking when i try to slide them down metal ring into place


I am doing mine right this second.

Use a light lubricant and just be gentle. I have nothing on hand, so I am using saliva. Gross, but it works.


Edited by matlobi (06/06/12 10:34 AM)
_________________________

2004 MGM Ultimate - Bone stock, for now.

Top
#2536895 - 06/06/12 10:21 PM Re: How to Change your EATC O-Rings [Re: Marqed_Man]
Rolling-Thunder Offline
Member

Registered: 04/25/02
Posts: 498
Loc: Albany, NY
The 007S70 O-rings are McMaster Carr part number 9396K12 and are silicone rubber.

Just use a little dielectric grease on them when installing.

I had more trouble removing the old ones, than putting these new ones in.

Check out this thread for some more information:

http://mercurymarauder.net/forums/showthread.php?t=36922


Edited by Rolling-Thunder (06/06/12 10:49 PM)
_________________________
2014 Escape, model S - white
2003 Crown Vic Sport - spruce green
MZT mod, 180 T-stat, NGK 4177 plugs, 21mm sway bar, fuel tank shield kit, Sil-blade low profile wipers


Top
#2536908 - 06/06/12 10:35 PM Re: How to Change your EATC O-Rings [Re: Marqed_Man]
Rolling-Thunder Offline
Member

Registered: 04/25/02
Posts: 498
Loc: Albany, NY

Here's some pictures from my repair session;


_________________________
2014 Escape, model S - white
2003 Crown Vic Sport - spruce green
MZT mod, 180 T-stat, NGK 4177 plugs, 21mm sway bar, fuel tank shield kit, Sil-blade low profile wipers


Top
#2537160 - 06/07/12 10:41 AM Re: How to Change your EATC O-Rings [Re: Rolling-Thunder]
P_Weston Offline

Cynical Bastard
Poobah

Registered: 06/27/07
Posts: 5201
Loc: Reno, Nevada
I have to do this to mine since I installed my EATC/Digidash.
_________________________

2000 Mercury Grand Marquis GS "Dewgong"

Top
#2537649 - 06/08/12 05:23 AM Re: How to Change your EATC O-Rings [Re: Marqed_Man]
Marqed_Man Offline
Over the Hill

Registered: 04/18/08
Posts: 3576
Loc: il
Its pretty darn easy! smile
_________________________
2004 LIncoln Town Car - Dark Charcoal Metalic. Motor has 82K miles. The rest of her has 290K miles. Past owner didnt take care of her. Im bringing her back to exceptional condition

Top
#2545836 - 06/20/12 11:19 PM Re: How to Change your EATC O-Rings [Re: Marqed_Man]
P_Weston Offline

Cynical Bastard
Poobah

Registered: 06/27/07
Posts: 5201
Loc: Reno, Nevada
I just changed my O rings out but I'm having an issue. I removed all the screws holding the solenoids in and labeled them 1 2 3 4 from left to right in a semi circle. However while doing the second and fourth ones, the black plastic pieces holding the wires freed up from the silver metal retainers. I put it back in the way I thought they went it. Now when I'm plugging everything back to test it, everything works except FLOOR and DEF/FLR. The dash vents just blow when the floor and floor defrost are selected on the screen. Does anyone have a diagram or a picture of which pins of the wire harness connected to the solenoids lead to which vacuum lines? I also tried turning off and restarting the EATC several times, but no change. It feels like simple error on my part, but I need to make sure.

Since I'm short on time, I tried to swap the second and fourth solenoids I labeled, and still no change.

In this picture, ignore the labels as they are only what button I pressed when I heard a certain solenoid pass air through it. Can anyone tell me if they see any wires going to the wrong one?


Edited by P_Weston (06/20/12 11:31 PM)
Edit Reason: Added picture
_________________________

2000 Mercury Grand Marquis GS "Dewgong"

Top
#2546683 - 06/22/12 12:11 AM Re: How to Change your EATC O-Rings [Re: Marqed_Man]
kb2enj Offline
Stranger

Registered: 06/12/12
Posts: 1
Loc: Maryville,TN
I purchased a 2004 Crown Vic LX with 102k miles on it. The blower was "stuck" in defrost mode. I ordered the O-rings from McMaster-Car, P/N 9396K12 now comes in a pack of 25 for $3.43 After replacing the O-rings all is well! Thanks for the "cheap" fix....Bob

Top
#2586978 - 08/27/12 09:34 PM Re: How to Change your EATC O-Rings [Re: Marqed_Man]
Chevyguy Offline

Poobah

Registered: 01/05/04
Posts: 9450
Loc: Winchester Mass
Just did this too, was super easy..

Some notes..

The old O rings in my 04 LX were super hard and crispy only one was sorta pliable. I just cut em with a knife and or sharp screwdriver to get em off.

Putting the solenoids back in one was pretty tight. Work it in slow twist to seat the O ring, dont' force it in like suggested above.

Rolled the new O rings on dry no problems none broken. Figure any lube in there could balk up the spring or the magnetic plunger.

Some nice leatherman pliers made great work of prying open and closing those tabs.

Fired up first try nice cold air out of the dash without having to wait 5-10 minutes of it going from floor to def to floor then eventually to the dash vents.

I will pre-emptively fix the Orings in the MM soon this was pretty mild project smile
_________________________
2004 MarauderM79 155K miles Jmod!! Rockin Stock tune Daily, Muscle Merc tune for track 14.85 @95.63
2004 Crown Vic LX SOLD!!

New Daily 2016 Dodge Charger R/T Road and track, purchase with 16K now 23K after 3 months. 5.7 Hemi, 8 speed ZF trans 3.06 open rear 13.98 @ 99.2 mph 4740 lbs with driver!!

R.I.P Photobucket 10 years of hosting down the drain

Project car 74 Chevy Laguna type S-3, # match 400 SBC

Previous rides
93 P-71 2001 P-73, 94 TC Exec, 96 TC Signature, 04 LX

Top
Page 1 of 7 1 2 3 4 5 6 7 >

Who's Online
1 registered (LordAeneas), 63 Guests and 8 Spiders online.
Key: Admin, Global Mod, Mod
Shout Box

Top Posters (30 Days)
Dmblanch 33
Old_Guy_Stu 32
RF_Overlord 32
speedfreak 28
Bellwestern80 27
LordAeneas 23
PrincePolaris 21
a_d_a_m 19
GM_Guy 16
Traffic22 16
Member Spotlight
Member Since: 04/14/05
Posts: 7871


Copyright 2000-2015 by Crownvic.net and Steve Spaulding. All Rights Reserved.
The photographs, graphics and data contained in this Web site are the properties of the contributors, or Crownvic.net and may not be used without expressed written consent.
Crownvic.net is not affiliated with the Ford motor company.

Happily consuming the fuel saved by Prius owners!